Introduction
As my recent evaluations of Gatsby were positive, I decided to migrate my personal blog.
Instead of quickly picking an already built theme with a lot of code I might not use—which I did during the previous migration from Medium to Hugo—this time, I decided to take a different route—building it from scratch.
I focused on the process, looking for ways to make site building more generic and reusable.
- Content migration
- Programmatic page creation in Gatsby
- Manage styles with
Typography.js - Automatic pagination
- Tag pages
- Add an admin panel with NetlifyCMS
This article will highlight lessons learned from the process, with the aim to provide high-level guidelines about patterns which can be applied in migrations from other static site generators to Gatsby.
Background before you start
Hugo is a super fast, convenient and well-supported tool for working with static sites. I think today it’s still more mature and closer to classical CMS comparing to Gatsby workflows.
As it’s an older ecosystem, when you need a ready plugin or a theme for quick gratification, it’s more likely to find something ready online for Hugo.
Gatsby, on the other hand, is based on React, GraphQL, Webpack and its way of thinking is closer to how a developer would approach the problems from a single-page-application point of view.
Gatsby might feel a bit more “raw”—there are starters and typography.js, but not so many ready made solutions in the conventional sense. Probably the closest marketplace for themes compared to others is gatsbythemes which is a young project.
If you have landed at this article researching which tool is better for your job, take a look at comparisons and keep in mind that selecting a stack boils down to being effective with it.
For me, using Gatsby is valuable learning experience and it has also been so easy to work with, it feels “unfair”. For example, the plugin system of Gatsby keeps me sane and productive, even in cases where I know only the briefest overview concepts of Webpack. Without Gatsby, I might have spent hours and days configuring what Gatsby provides out of the box.
Last, but not least, the biggest benefit of using Gatsby compared to Hugo, is the JavaScript tool-chain. Important tasks such as making a progressive web app, hot module reloading, etc are much easier in comparison to other static site generators.
Content migration
This task was easier than expected. The file structure is preserved between my
previous blog and the current version. Both Hugo and Gatsby work well when
markdown files are stored at a content/post folder.
The only work I had to do on the content migration was to reformat the
frontmatter. In Hugo, I
used TOML, whereas gatsby-transformer-remark works only with YAML for the
moment. Luckily, I still had the Hugo CLI on my system so could make use of its
build-in conversion tool. The
only issue I had was that sometimes titles were longer than 1 line and were not
parse-able, so I just had to cut some words out where problematic.
My previous frontmatter already contained title, date, tags, and most
importantly - the slug fields. These were enough for my later work on the
programmatic creation of pages explained in the next section.
Programmatic page creation
This is the official
documentation,
plus there is a
tutorial, which
gives examples. In sum, I created a gatsby-node.js file which exports
createPages method using the createPage action from
boundActionCreators.
This might sound way more complicated than what it is:
exports.createPages = ({ graphql, boundActionCreators }) => {
  const { createPage } = boundActionCreators
  graphql(`
    {
      allMarkdownRemark {
        edges {
          node {
            frontmatter {
              title
              slug
              tags
            }
          }
        }
      }
    }
  `).then(result => {
    const posts = result.data.allMarkdownRemark.edges
    // Create content programmatically here
  })
}
As you see, getting the list of posts can be done in a single query.
The result of this query can later be handled by a “creator” function, which I prefer to keep in a separate module. For example, creating posts works like following:
const path = require(`path`)

module.exports = (createPage, nodes) => {
  const template = path.resolve(`src/templates/post.js`)

  nodes.map(({ node }) => {
    if (node.frontmatter.slug) {
      createPage({
        path: node.frontmatter.slug,
        component: template,
        context: {
          slug: node.frontmatter.slug,
        },
      })
    }
  })
}
I re-use the slug field of the frontmatter of my existing structure. I don’t
have to generate or calculate slugs based on information of other fields, i.e.
my scenario is easier than the tutorial on the official docs.
This is an example of “unfair” easy - I don’t have to do literally anything to keep my previous URLs of existing content the same in the new system.
The display of the data is handled by a React component acting as a template. My case is nothing different than the official documentation.
Adding styles
Now that the system displays the content, it’s time to style it. I decided to go
for the
typography.js route.
The approach is well documented and you can also see
previews of the themes online.
Steps were:
Add gatsby-plugin-typography and typography-theme-moraga (for example) and
“enable” the plugin in the gatsby-config.js file:
{
  resolve: `gatsby-plugin-typography`,
  options: {
    pathToConfigModule: `src/utils/typography`,
  },
},
In src/utils/typograhy add:
import Typography from "typography"
import theme from "typography-theme-moraga"

theme.overrideThemeStyles = () => {
  return {
    // Color contrast correction https://dequeuniversity.com/rules/axe/2.2/color-contrast
    a: {
      color: `#185D8B`,
    },
    img: {
      position: `relative`,
      left: `50%`,
      transform: `translateX(-50%)`,
    },
  }
}

theme.baseFontSize = `22px`
const typography = new Typography(theme)

module.exports = typography
and start the project again to see:
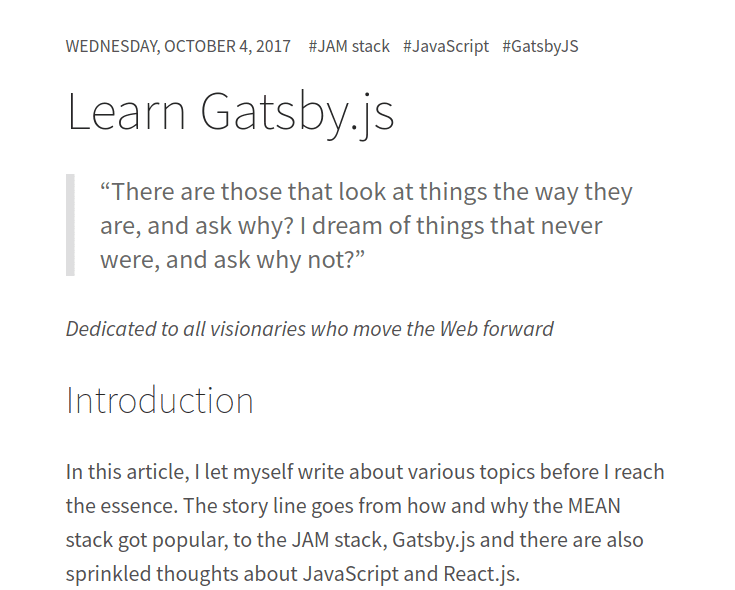
As you can see, with minimal efforts, the styles are basically ready! :)
I import any theme with theme variable since the plugin can change and the
rest of the code will stay intact.
Pagination and tags pages
Having a decent grasp of how to create content in my new site, I proceeded with creating pagination. I have about 30 blog posts, so I went for a split by 10 to give an impression I have a lot of content :)
As usual, a good starting point was searching for example implementations
available in
examples and the
issue queue. There, in the issue queue, is a gem
epic about plugins wishlist
where I found the discussion leading to
gatsby-paginate.
I wanted to have different contexts than the plugin, so I took inspiration for both tags and pagination scenarios. I kept them as separate action creators and I just called them in the main creator function like this:
const createPostPages = require(`./gatsby-actions/createPostPages`)
const createPaginatedPostsPages = require(`./gatsby-actions/createPaginatedPostsPages`)
const createTagPages = require(`./gatsby-actions/createTagPages`)

exports.createPages = ({ graphql, boundActionCreators }) => {
  const { createPage } = boundActionCreators
  graphql(`
    {
      allMarkdownRemark(sort: { fields: [frontmatter___date], order: DESC }) {
        edges {
          node {
            frontmatter {
              title
              slug
              tags
            }
          }
        }
      }
    }
  `).then(result => {
    const posts = result.data.allMarkdownRemark.edges
    createPostPages(createPage, posts)
    createPaginatedPostsPages(createPage, posts)
    createTagPages(createPage, posts)
  })
}
Easy to read, understand and maintain. The pagination module is a bit longer than the one of the posts:
const path = require(`path`)

module.exports = (createPage, nodes) => {
  const template = path.resolve(`src/templates/postList.js`)
  const paginateSize = 10

  // Split posts into arrays of length equal to number posts on each page/paginateSize
  const groupedPages = nodes
    .map((node, index) => {
      return index % paginateSize === 0
        ? nodes.slice(index, index + paginateSize)
        : null
    })
    .filter(item => item)

  // Create new indexed route for each array
  groupedPages.forEach((group, index, groups) => {
    const pageIndex = index === 0 ? `` : index + 1
    const paginationRoute = `/blog/${pageIndex}`
    // Avoid showing `Previous` link on first page - passed to context
    const first = index === 0 ? true : false
    // Avoid showing `Next` link if this is the last page - passed to context
    const last = index === groups.length - 1 ? true : false

    return createPage({
      path: paginationRoute,
      component: template,
      context: {
        group,
        first,
        last,
        index: index + 1,
      },
    })
  })
}
Then, pull context information in the React component:
const BlogPagedIndex = ({ pathContext }) => {
  const { group, index, first, last } = pathContext;
  return (
    <div>
      // Some elements
      ...

      // The posts
      <ul>
        {group.map((node, key) => <Post key={key} node={node} />)}
      </ul>

      // The pager
      <div>
        {!first && (
          <Link to={`/blog/${index > 2 ? index - 1 : ''}`}>Newer posts<Link>
        )}
        {!last && (
          <Link to={`/blog/${index + 1}`}>Older posts</Link>
        )}
      </div>
    </div>
  );
};

export default BlogPagedIndex;
This is a cut-down version of the component only for the blog post, do not copy with too much trust…
I have to be honest—I haven’t built pagination before with React/Redux, but I feel this pagination approach is easier. Also, I want the pagination pages to be accessible at all times, not only on state change, so the content creation approach of building the list works well for me.
I will say again that I see this is “unfair” easy. It’s probably the quickest implementation of pagination I’ve made in my life.
For the list of tags and inner tags pages, the approach was similar but passing different context to the template component:
For the overview page of tags:
createPage({
  path: `/tags`,
  component: template,
  context: {
    posts,
  },
})
For the inner tag page:
createPage({
  path: `/tags/` + slugify(tagName),
  component: template,
  context: {
    posts,
    post,
    tag: tagName,
  },
})
Admin panel
Initially, I tried to use the git-gateway identity management approach in
Netlify, but it didn’t work for me. I could not reach the point to validate or
reset the password for my user 1, so I kept the “old-school” way of GitHub
integration which works just fine for me at the moment, having the fact I will
be 1 user to work on the site.
Not to mention also that I add this admin panel mostly for demoing the concept of JAM stack with admin panel to friends, colleagues and potential clients.
Long story short, this is the config.yml configuration file:
backend:
  name: github
  repo: kalinchernev/kalinchernev.github.io # Path to your GitHub repository
  branch: gatsby # Branch to update (master by default)

publish_mode: editorial_workflow
media_folder: "static/images" # Folder where user uploaded files should go

collections: # A list of collections the CMS should be able to edit
  - name: "post" # Used in routes, ie.: /admin/collections/:slug/edit
    label: "Post" # Used in the UI, ie.: "New Post"
    folder: "content/post" # The path to the folder where the documents are stored
    sort: "date:desc" # Default is title:asc
    create: true # Allow users to create new documents in this collection
    slug: "{{slug}}"
    fields: # The fields each document in this collection have
      - { label: Title, name: "title", widget: "string", tagname: "h1" }
      - { label: "Date", name: "date", widget: "datetime" }
      - { label: Slug, name: "slug", widget: "string" }
      - {
          label: Tags,
          name: tags,
          widget: list,
          default: ["APIs", "JavaScript"],
        }
      - { label: "Body", name: "body", widget: "markdown" }
The only interesting part is the gatsby branch which I used in parallel to the
blog branch. The gatsby branch is my development/staging and blog is my
production.
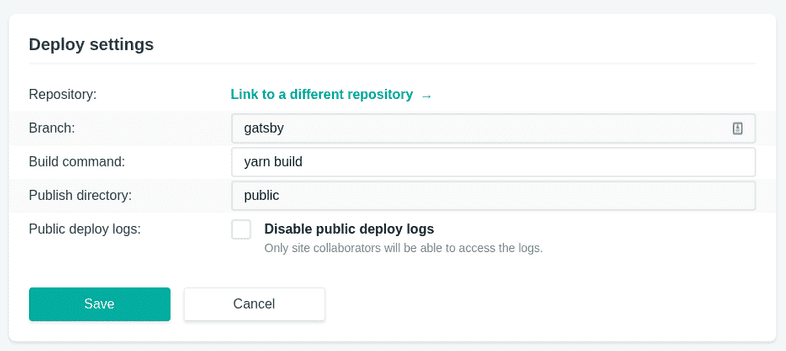
The branch in this configuration has to match to deployment branch of Netlify service:
This is my admin page React component which is placed in src/pages/admin so
that Gatsby delivers the HTML page at /admin.
import React from "react"
import { Helmet } from "react-helmet"

const AdminPage = () => (
  <div className="admin">
    <Helmet>
      <meta charSet="utf-8" />
      <meta name="viewport" content="width=device-width, initial-scale=1.0" />
      <title>Content Manager</title>
      <link
        rel="stylesheet"
        href="https://unpkg.com/netlify-cms@^0.5.0/dist/cms.css"
      />
      <script
        type="text/javascript"
        charSet="utf-8"
        async
        src="https://unpkg.com/netlify-cms@^0.5.0/dist/cms.js"
      />
    </Helmet>
  </div>
)

export default AdminPage
In order for NetlifyCMS script to find the configuration file correctly,
config.yml should be placed in static/admin/config.yml.
Any other location or file name will result in an error.
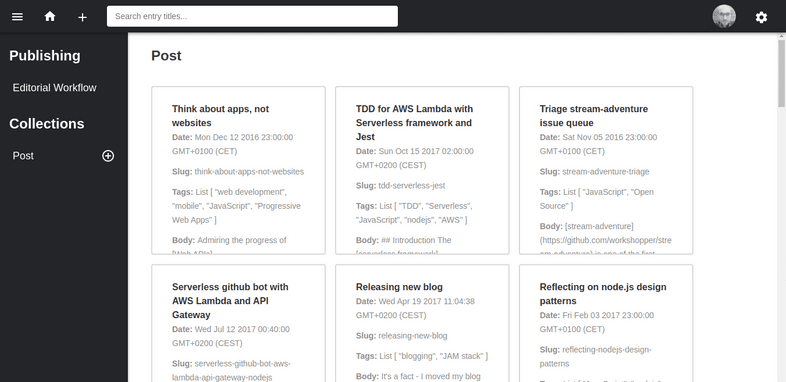
So, here’s how my admin panel looks:
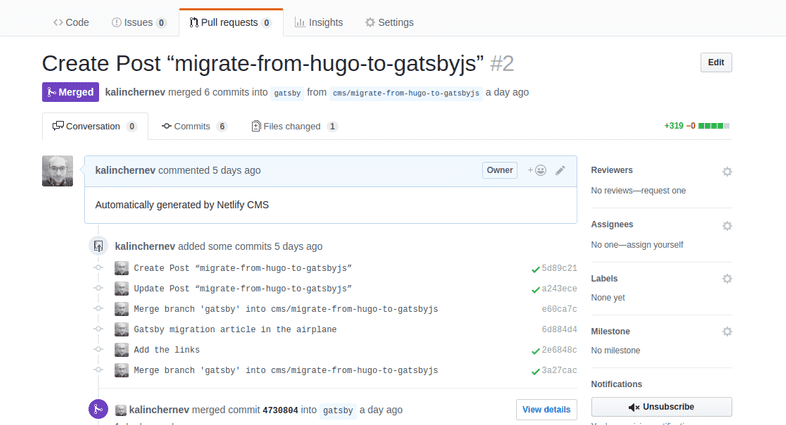
Creating a new draft post yields a pull request:
Interesting part is that NetlifyCMS creates the pull request on my behalf with a given state of the branch. I could continue working on the content of the post when I’m offline (in an airplane) and push to the branch later when I’m back online to trigger a new preview from Netlify. Only when I decide to, I merge latest changes for styles and PWA tweaks back to the post preview branch to see whole picture and approve the post, merging it to the main branch.
This content workflow fits very well in the model we have as developers and provides granular previews of changes when and how we decide to manage.
Conclusions
In this blog post I shared how a migration to Gatsby from a static generator like Hugo can work. The reasons for doing a migration like this are part development benefits (it’s a lot easier) and also a better production site which feels as smooth as a single page application.
We also went through the few technical details necessary to realize the migration, using GraphQL query, creators and templates.
Lastly, we added an admin panel to make content management easier for our editors and clients.
Enjoy!


