In this post, we’ll walk through how to host & publish your next Gatsby site to AWS using AWS Amplify.
AWS Amplify is a combination of client library, CLI toolchain, UI components & CI / CD hosting platform. Amplify allows developers to get up & running with full-stack cloud-powered applications with features like authentication, GraphQL, storage, REST APIs, analytics, Lambda functions, hosting & more.
Using the Amplify console, you can now easily deploy your application to AWS with built in CI / CD & atomic deployments.
Getting Started - Gatsby
First, we’ll want to create a new Gatsby project. If you don’t already have Gatsby installed, install it:
npm install --global gatsby-cliNext, we’ll create a new Gatsby site:
gatsby new my-gatsby-siteFinally, change into the new site directory:
cd my-gatsby-siteGetting Started - AWS Amplify
Now that we have our Gatsby site up & running, let’s add hosting & make the site live on AWS.
To do so, create a new GitHub repo & push the project to the repo.
git init

git remote add origin git@github.com:<username>/<projectname>.git

git add .

git commit -m 'initial commit'

git push origin master
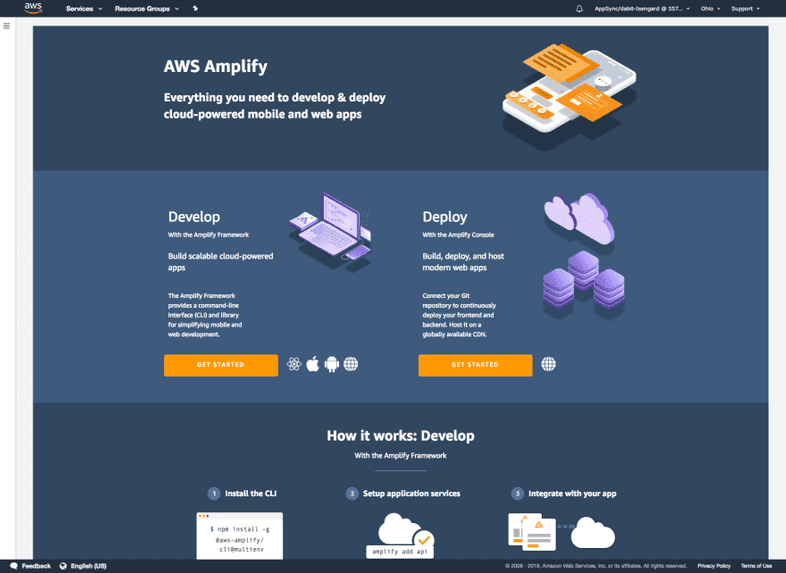
Now that the GitHub project has been created we can log into the Amplify Console.
From here, under Deploy we can click GET STARTED:
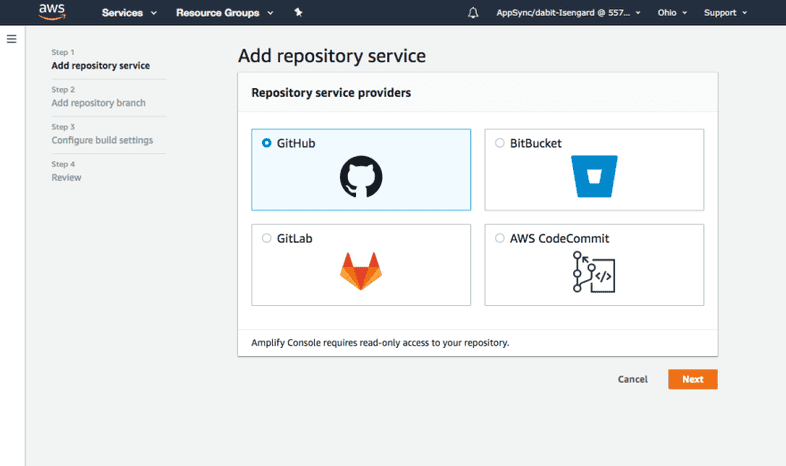
Next, we’ll choose GitHub as our repository & click Next.
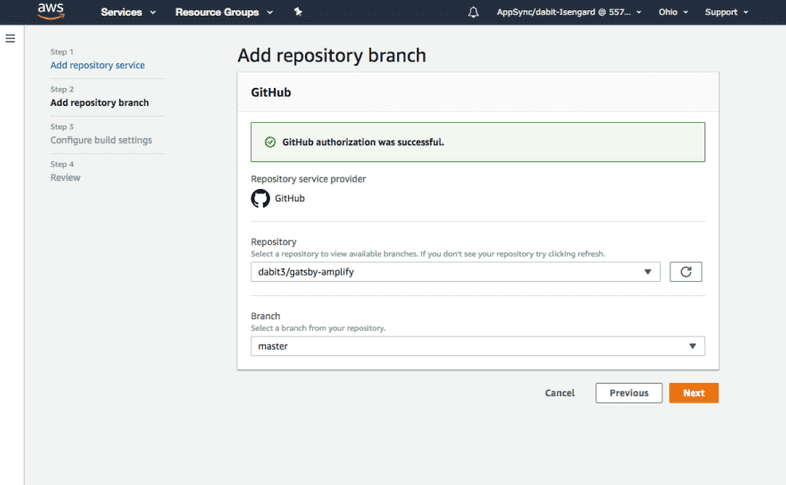
Then connect the mater branch of the new repo we just created & click Next:
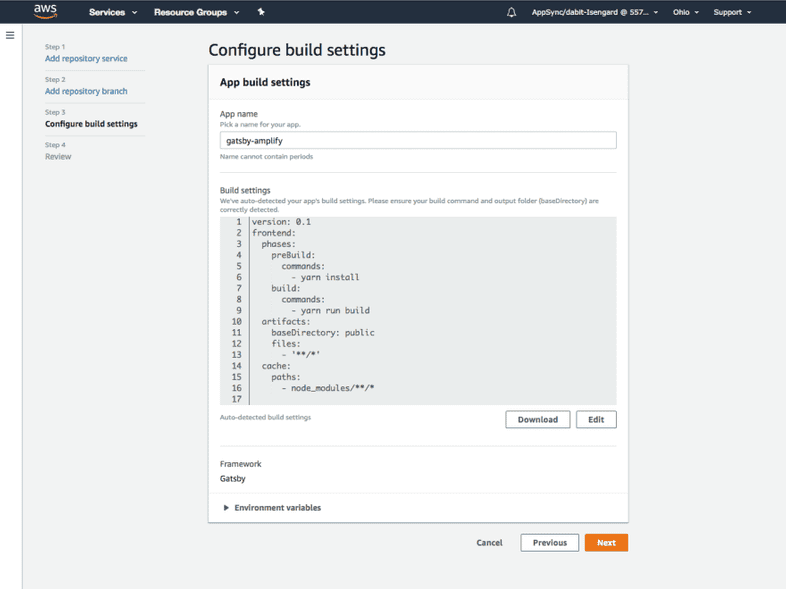
In this view, we can review the default build settings & click Next to continue:
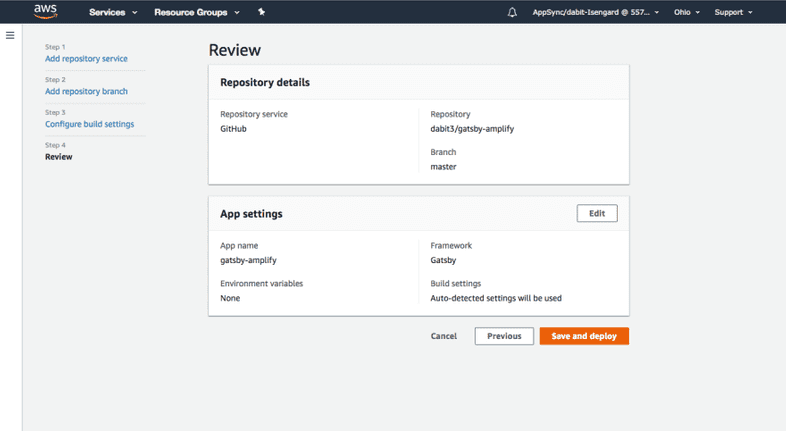
Finally, we can review the deployment & click Save & Deploy when we’re ready to deploy our app:
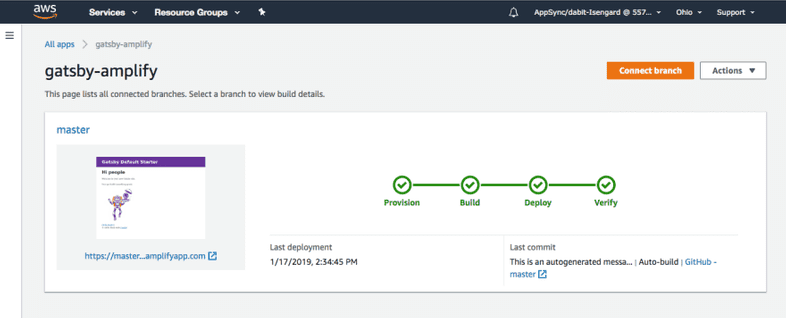
Once the deployment is successful, you should see this:
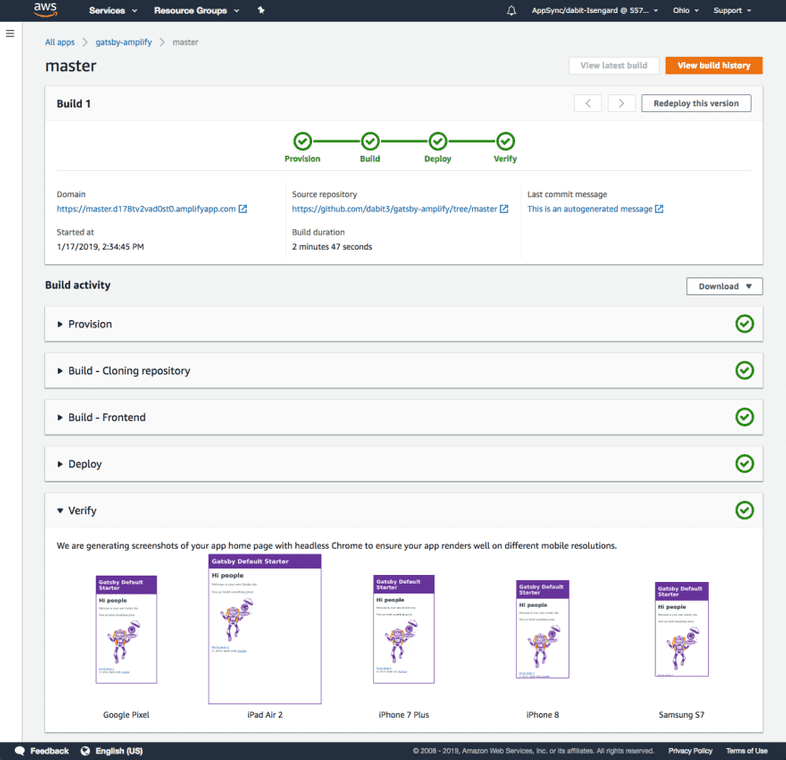
To view details of the deployment, click on the name of the branch (in our case, master).
In this view, you can see details about the deployment including a link to view the app & screenshots of the app on different devices.
Kicking off a new build
Now that our app is deployed, let’s take it one step further. The Amplify Console will automatically watch your master branch & kick off a new build whenever new code is merged. Let’s test this out.
Open src/pages/index.js & replace the following line:
<h1>Hi people</h1>with this:
<h1>Hello from Amplify</h1>Save the file & push the changes to your master branch:
git add .

git commit -m 'updated heading'

git push origin master
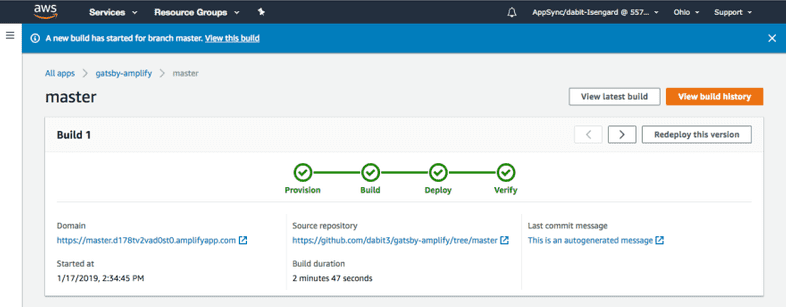
Now, when we go back into the Amplify console we’ll see that a new build has been started:
When the build is completed & we launch the app, we should now see our new heading:
Next Steps
Now that you’ve gotten the hang of working with the Amplify Console, what are some next steps?
If you’re interested in adding authentication to your Gatsby app, check out this Gatsby Auth Starter I published.
If you’re interested in adding new features to your Gatsby app (like authentication or a GraphQL API), check out the Amplify CLI & Amplify Client libraries.
You may also be interested in working with multiple environments or teams. If so, check out the documentation on how to get up & running with teams or have a look at this post that I wrote.

