Transformer plugins
This tutorial is part of a series about Gatsby’s data layer. Make sure you’ve gone through part 4 and part 5 before continuing here.
What’s in this tutorial?
The previous tutorial showed how source plugins bring data into Gatsby’s data system. In this tutorial, you’ll learn how transformer plugins transform the raw content brought by source plugins. The combination of source plugins and transformer plugins can handle all data sourcing and data transformation you might need when building a Gatsby site.
Transformer plugins
Often, the format of the data you get from source plugins isn’t what you want to use to build your website. The filesystem source plugin lets you query data about files but what if you want to query data inside files?
To make this possible, Gatsby supports transformer plugins which take raw content from source plugins and transform it into something more usable.
For example, markdown files. Markdown is nice to write in but when you build a page with it, you need the markdown to be HTML.
Add a markdown file to your site at
src/pages/sweet-pandas-eating-sweets.md (This will become your first markdown
blog post) and learn how to transform it to HTML using transformer plugins and
GraphQL.
---
title: "Sweet Pandas Eating Sweets"
date: "2017-08-10"
---

Pandas are really sweet.

Here's a video of a panda eating sweets.

<iframe width="560" height="315" src="https://www.youtube.com/embed/4n0xNbfJLR8" frameborder="0" allowfullscreen></iframe>
Once you save the file, look at /my-files/ again—the new markdown file is in
the table. This is a very powerful feature of Gatsby. Like the earlier
siteMetadata example, source plugins can live-reload data.
gatsby-source-filesystem is always scanning for new files to be added and when
they are, re-runs your queries.
Add a transformer plugin that can transform markdown files:
npm install --save gatsby-transformer-remarkThen add it to the gatsby-config.js like normal:
module.exports = {
  siteMetadata: {
    title: `Pandas Eating Lots`,
  },
  plugins: [
    {
      resolve: `gatsby-source-filesystem`,
      options: {
        name: `src`,
        path: `${__dirname}/src/`,
      },
    },
    `gatsby-transformer-remark`,    `gatsby-plugin-emotion`,
    {
      resolve: `gatsby-plugin-typography`,
      options: {
        pathToConfigModule: `src/utils/typography`,
      },
    },
  ],
}
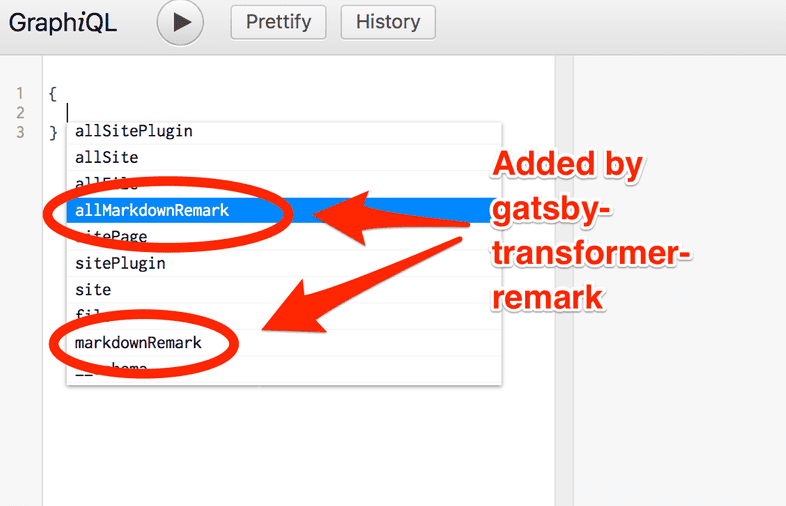
Restart the development server then refresh (or open again) Graph_i_QL and look at the autocomplete:
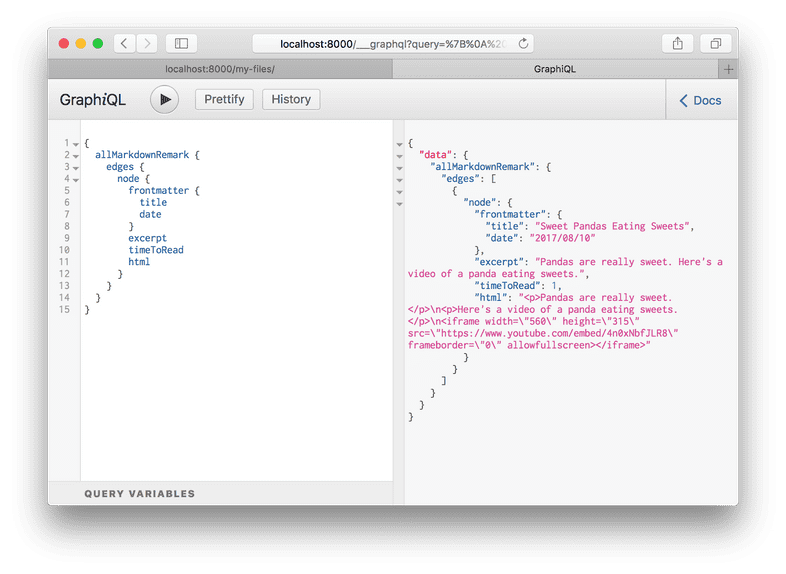
Select allMarkdownRemark again and run it as you did for allFile. You’ll
see there the markdown file you recently added. Explore the fields that are
available on the MarkdownRemark node.
Ok! Hopefully, some basics are starting to fall into place. Source plugins bring data into Gatsby’s data system and transformer plugins transform raw content brought by source plugins. This pattern can handle all data sourcing and data transformation you might need when building a Gatsby site.
Create a list of your site’s markdown files in src/pages/index.js
Now you’ll have to create a list of your markdown files on the front page. Like many blogs, you want to end up with a list of links on the front page pointing to each blog post. With GraphQL you can query for the current list of markdown blog posts so you won’t need to maintain the list manually.
Like with the src/pages/my-files.js page, replace src/pages/index.js with
the following to add a GraphQL query with some initial HTML and styling.
import React from "react"
import { graphql } from "gatsby"
import { css } from "@emotion/core"
import { rhythm } from "../utils/typography"
import Layout from "../components/layout"

export default ({ data }) => {
  console.log(data)
  return (
    <Layout>
      <div>
        <h1
          css={css`
            display: inline-block;
            border-bottom: 1px solid;
          `}
        >
          Amazing Pandas Eating Things
        </h1>
        <h4>{data.allMarkdownRemark.totalCount} Posts</h4>
        {data.allMarkdownRemark.edges.map(({ node }) => (
          <div key={node.id}>
            <h3
              css={css`
                margin-bottom: ${rhythm(1 / 4)};
              `}
            >
              {node.frontmatter.title}{" "}
              <span
                css={css`
                  color: #bbb;
                `}
              >
                — {node.frontmatter.date}
              </span>
            </h3>
            <p>{node.excerpt}</p>
          </div>
        ))}
      </div>
    </Layout>
  )
}

export const query = graphql`
  query {
    allMarkdownRemark {
      totalCount
      edges {
        node {
          id
          frontmatter {
            title
            date(formatString: "DD MMMM, YYYY")
          }
          excerpt
        }
      }
    }
  }
`
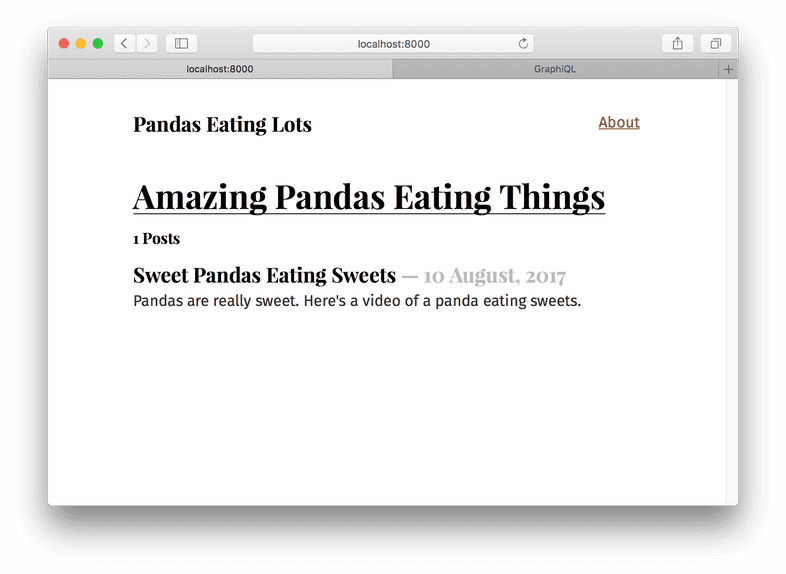
Now the frontpage should look like:
But your one blog post looks a bit lonely. So let’s add another one at
src/pages/pandas-and-bananas.md
---
title: "Pandas and Bananas"
date: "2017-08-21"
---

Do Pandas eat bananas? Check out this short video that shows that yes! pandas do
seem to really enjoy bananas!

<iframe width="560" height="315" src="https://www.youtube.com/embed/4SZl1r2O_bY" frameborder="0" allowfullscreen></iframe>
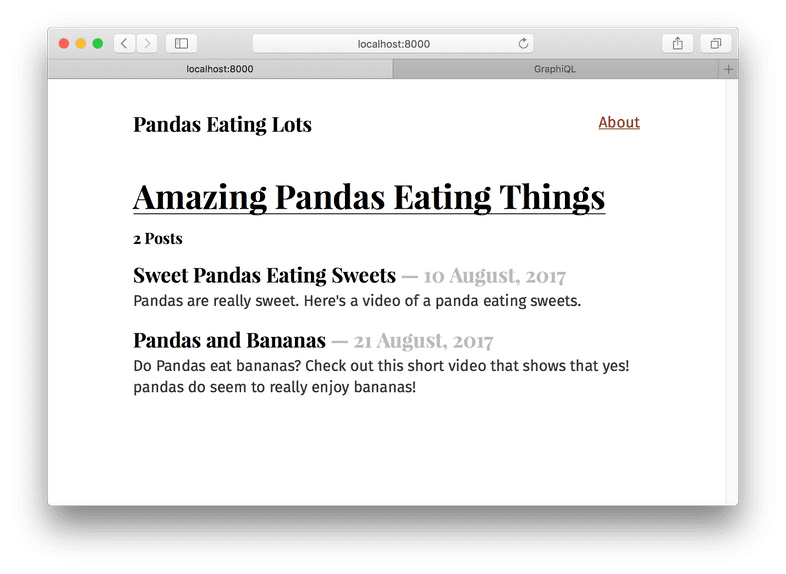
Which looks great! Except… the order of the posts is wrong.
But this is easy to fix. When querying a connection of some type, you can pass a
variety of arguments to the GraphQL query. You can sort and filter nodes, set how
many nodes to skip, and choose the limit of how many nodes to retrieve. With
this powerful set of operators, you can select any data you want—in the format you
need.
In your index page’s GraphQL query, change allMarkdownRemark to
allMarkdownRemark(sort: { fields: [frontmatter___date], order: DESC }). Note: There are 3 underscores between frontmatter and date. Save
this and the sort order should be fixed.
Try opening Graph_i_QL and playing with different sort options. You can sort the
allFile connection along with other connections.
For more documentation on our query operators, explore our GraphQL reference guide.
Challenge
Try creating a new page containing a blog post and see what happens to the list of blog posts on the homepage!
What’s coming next?
This is great! You’ve just created a nice index page where you’re querying your markdown files and producing a list of blog post titles and excerpts. But you don’t want to just see excerpts, you want actual pages for your markdown files.
You could continue to create pages by placing React components in src/pages. However, you’ll
next learn how to programmatically create pages from data. Gatsby is not
limited to making pages from files like many static site generators. Gatsby lets
you use GraphQL to query your data and map the query results to pages—all at build
time. This is a really powerful idea. You’ll be exploring its implications and
ways to use it in the next tutorial, where you’ll learn how to programmatically create pages from data.
Edit this page on GitHub


